
Find DADGAD guitar chord shapes that fit your hand
The six strings in DADGAD are tuned D–A–D–G–A–D from low to high. Changing from standard tuning moves the notes under several fingers. Fretboard Lab searches for shapes using the pitches of the selected tuning and shows the results across the whole neck. This exercise finds a D-major shape, adds G and A, and checks whether the three grips work together.
Select the tuning and the key
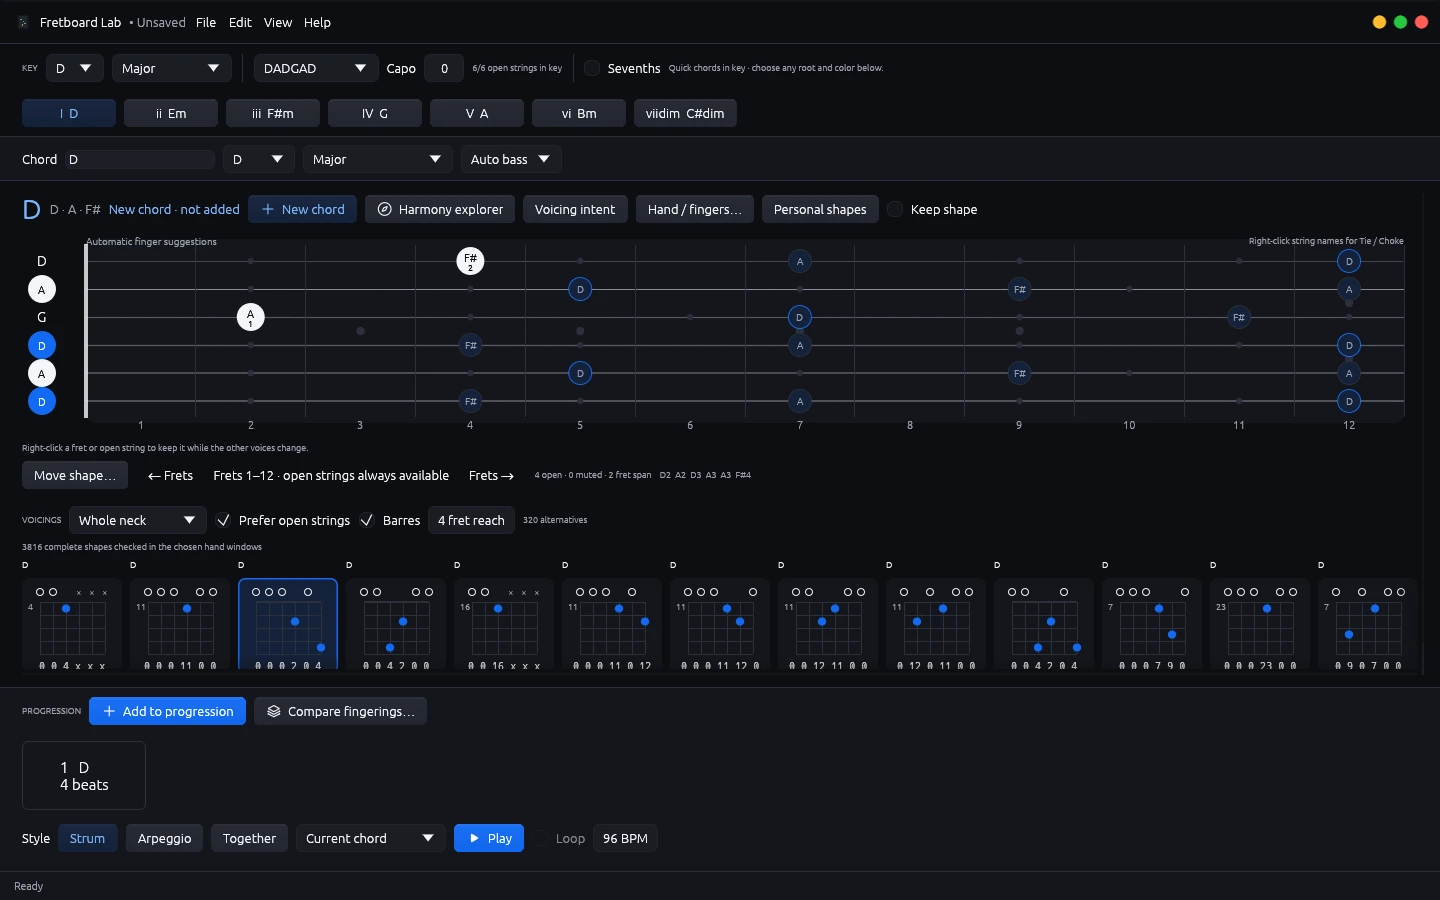
Set the tuning selector to DADGAD and leave the capo at zero for the first pass. Check the open string labels on the fretboard against the pitches on your guitar. Then select D major in the key controls. Tuning describes the open strings. Key controls the chord family used by the Roman-numeral buttons. Both choices matter when you are checking a shape against the actual instrument.
Click I D to show D major. The fretboard highlights D, F♯ and A. Look at the candidate cards under the neck. Each card has markers for open strings, sounded frets and muted strings. Test one shape slowly on the instrument, sounding each intended string alone, then strum it as a whole. The DADGAD walkthrough shows the fretboard and the alternatives in this tuning.
Compare grip, register and openness
Try a second candidate with a different arrangement of open strings. Read the low-to-high fret pattern and check the number of muted strings. An open D can act as a drone if it fits the harmony. A shape with more open strings will often ring across a change, so listen to which notes overlap when you lift and replace fingers.
Use the reach control to limit how far the fretted positions can spread. Try Prefer open strings and the barre option in separate passes. The resulting shapes can differ even with the same chord name. Compare the highest sounding note and the lowest sounding note, since those pitches affect how a chord sits in a melody or on top of a bass part. A shape that seems comfortable by itself may still require a large change to reach the next chord.
Build three steps as a real progression
Add the chosen D shape to the progression. Click IV G and choose a G-major shape using the same tuning. Add that shape and repeat with V A. Check the progression strip for D, G and A in order. On your guitar, play from one grip to the next and notice if an open string continues ringing through a change where you want a cleaner break.
Use Compare fingerings to see an alternative set across the sequence. Listen to the current and suggested playing before deciding whether to apply the change. In the example video both versions keep D, G and A, with different individual fret patterns. That lets your ear compare their voicing and your hand compare the motion.
Check sound and capo independently
Audition a single chord and switch back to progression playback when the shapes are ready. The playback controls offer strummed, arpeggiated and together styles. The first two help reveal which strings are sounding. Let the finished chord ring and check that the open pitches you hear agree with the intended tuning.
If you add a capo for a song, update the capo setting and verify the resulting sounding notes before you reuse the shape. When a chart names the sounding chord and your guitar chart refers to a position or shape, read the pitch labels as a check. Before exporting a diagram, confirm the tuning, capo position and the open and muted marks for every string.
Keep a reference you can reopen
Save the tuning and fingerings in a project when you have a playable progression. The four-chord example is a separate editable project in standard tuning, with audio for both Strum and Arpeggio. Work through it if you want a second example of comparing playback with the same saved fingerings.