
Compare guitar chord fingerings across a progression
A chord name gives you harmonic information. A fingering decides which notes sound on which strings and where your hand goes next. In Fretboard Lab you can compare a full progression with different fingerings and listen to both passes before applying an alternative. Start from a progression you know so you can focus on the difference between the shapes.
Use the same chords for both passes
Download the four-chord practice project and open it in Fretboard Lab. It contains C, G, Am and F at 96 BPM in E Standard. The two audio files on the page play the same saved chords as strummed and arpeggiated versions. Listen to each once. This comparison uses fixed pitches and fingerings, which makes the change in playback style easy to hear before you compare a new set of fingerings.
Play the progression and look at the active step. Check where the lowest bass note and highest note appear on the active shape. Repeat for the next step. Write down the change in highest note as a small melody. In an accompaniment part, that melody can matter even if the chord names on paper remain fixed.
Decide which movement matters most
Guitar voicings often require a trade between easier fretting and a particular register. Suppose a chord is comfortable using an open shape, while the next chord has a melody note farther up the neck. Review the candidate list for the first chord and look for another shape closer to the target position. Check the gap between its lowest and highest fretted positions. Confirm any new open notes or muted strings by plucking each string in sequence.
There are several useful listening tests. For a bass-led arrangement, listen to the lowest notes as a line and check if the chosen inversion supports the next harmony. For a chord-melody part, compare highest notes and listen to whether the desired phrase remains recognizable. For rhythm guitar, compare how evenly the shapes speak under a single strum. Pick a criterion before opening the comparison panel so you can judge both passes on the same basis.
Open Compare fingerings on the progression
Choose Compare fingerings beneath the fretboard. The dialog shows current and suggested fret patterns along with movement details. A proposed shape can change which strings sound. Inspect at least the first change, along with the step where you felt the largest hand movement. The recorded DADGAD example shows the current and proposed versions of D–G–A.
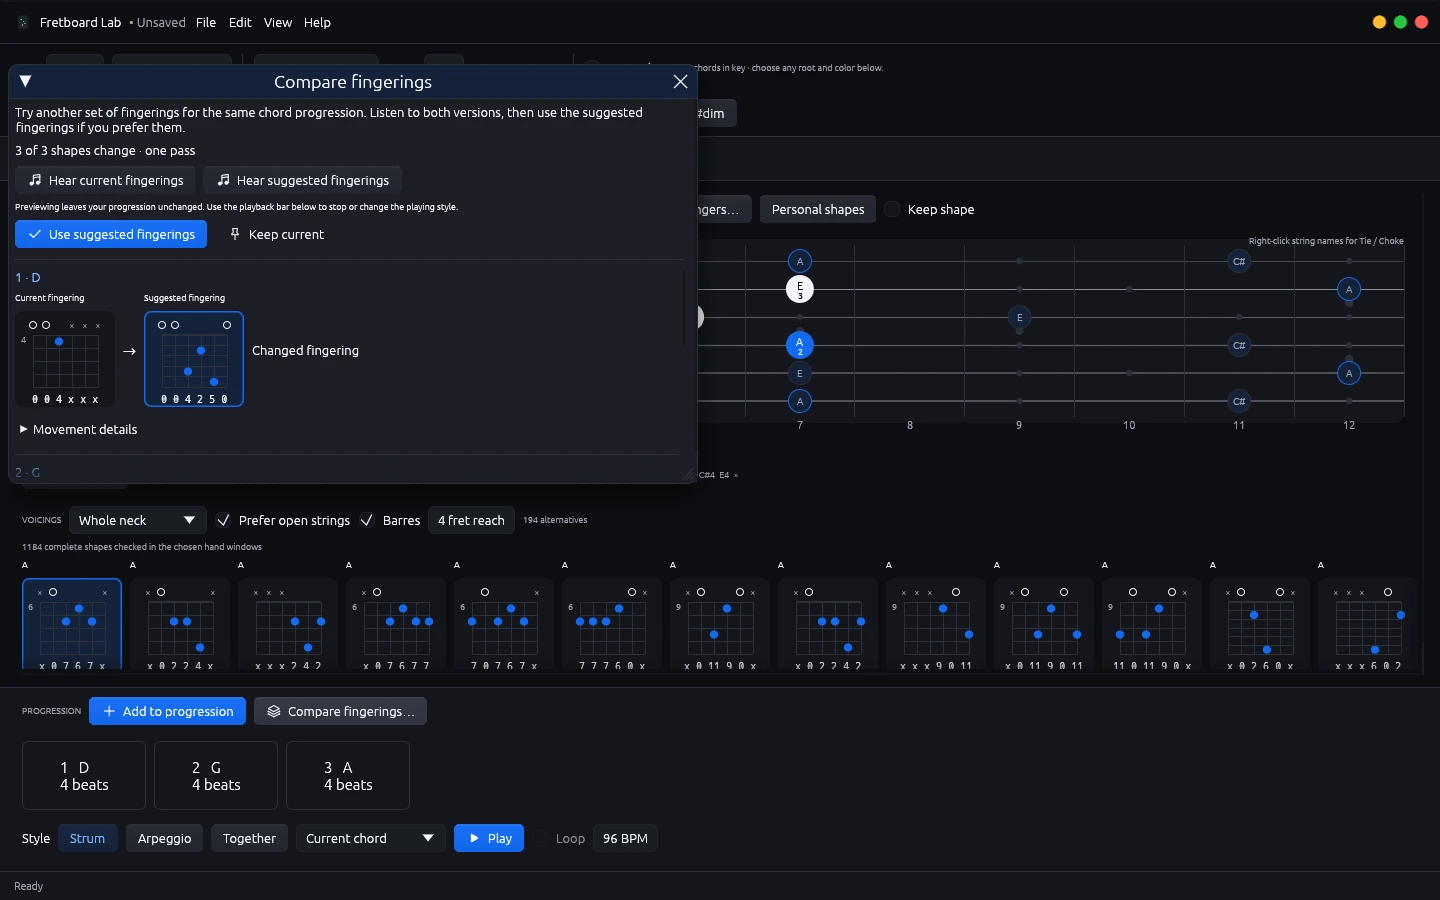
Use Hear current fingerings and Hear suggested fingerings. Set a comfortable tempo and use the same playback mode for both. Listen through the full phrase, including the first chord after your difficult transition. Then try the two patterns on the physical guitar. Place a finger on each intended fret and check whether the change works in time. The suggested voicing is an option to audition and verify before choosing it.
Keep only the changes you can play and hear
If the proposed sequence serves the section, apply it and play the full progression one more time. If the current shapes work better for the melody or your hand, keep them. You can also edit a single step and compare again. Keep a known version of the original project while testing several alternatives so that you can return to the same starting voicings.
Check the diagram before sharing
When you have a stable sequence, check the project tuning and capo, the step order, and the open or muted marks on every string. If a student or collaborator will follow printed chord diagrams, include enough context to identify which shape goes with each bar. Use the diagram export guide to prepare the diagrams and replay the original progression alongside them to verify the shapes.